
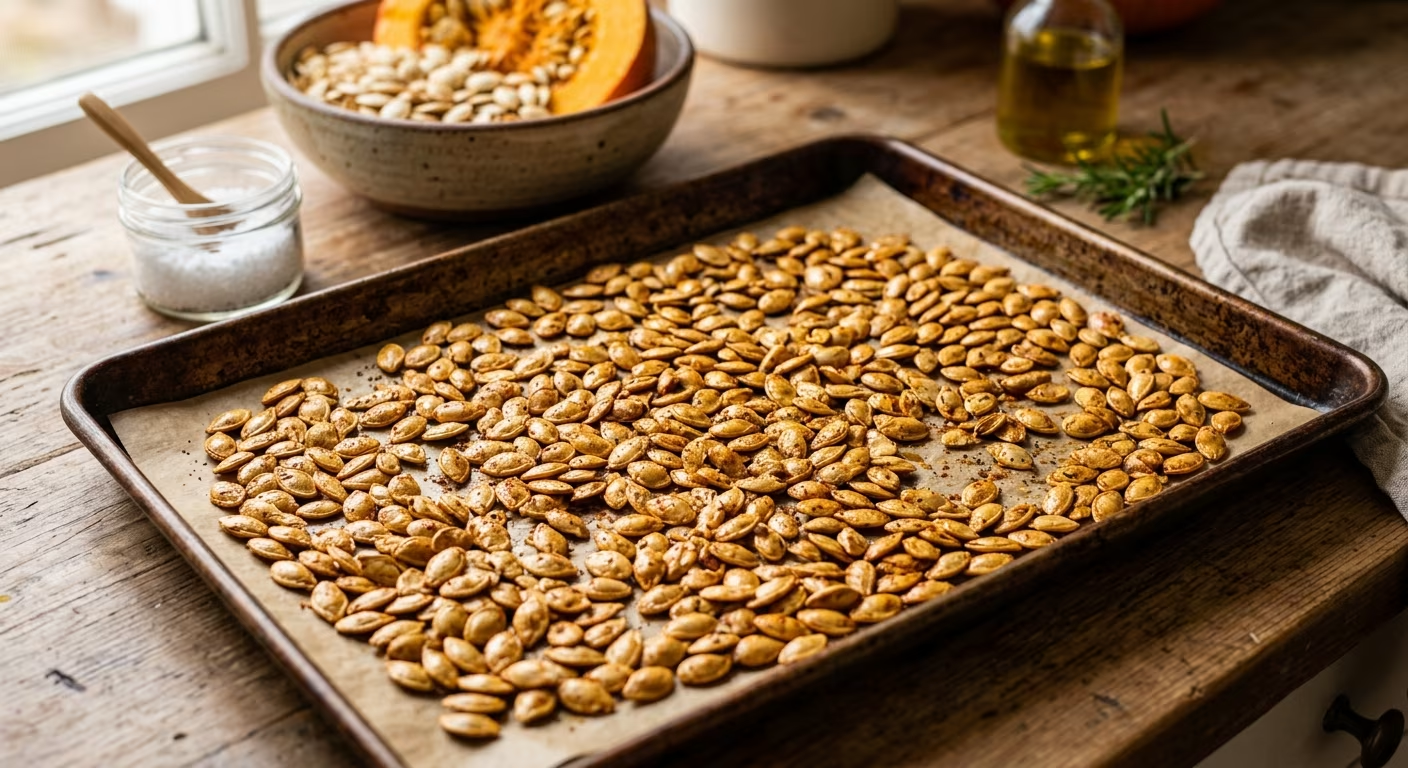
Every autumn, millions of people scoop pumpkins clean and then toss those seeds straight into the trash. I used to do the same thing. Then one Halloween, a friend handed me a bowl of freshly roasted pumpkin seeds seasoned with garlic and sea salt, and I nearly ate the whole bowl myself. That was it I was converted.
After years of roasting pumpkin seeds every fall (and honestly, at other times of the year too), I’ve learned what works, what doesn’t, and how to get that satisfying crunch every single time. This guide is everything I wish someone had told me at the start.
Why You Should Never Throw Away Pumpkin Seeds
Before we get into the how-to, let’s talk about the why. Pumpkin seeds are one of the most nutrient-dense snacks you can make at home and they cost you nothing extra if you’re already cooking or carving pumpkins.
According to research published in the National Institutes of Health, pumpkin seeds are significant sources of proteins, carotenoids, tocopherols, and antioxidants. Per ounce, they pack roughly 126 calories, 5.3 grams of protein, 5.5 grams of healthy fat, and 5 grams of dietary fiber. Magnesium, zinc, potassium, and iron are all present in meaningful amounts.
Dartmouth Health notes that seeds and nuts are “dense in calories from healthy fats like omega-3, and they provide antioxidants like vitamin E, as well as minerals like selenium, magnesium, and potassium.” Cleveland Clinic registered dietitian Beth Czerwony puts it simply: “Pumpkin seeds are a good source of plant protein and other nutrients, which can act as antioxidants to help protect against certain diseases.”
And for vegetarians or plant-based eaters, here’s a bonus: pumpkin seeds contain a very high-quality protein, comparable to soy protein, and include essential amino acids your body needs.
Pumpkin Seeds: Quick Nutrition Overview
| Nutrient | Per 1 oz (28g) |
|---|---|
| Calories | ~126 |
| Protein | 5.3g |
| Fat (mostly unsaturated) | 5.5g |
| Dietary Fiber | 5g |
| Magnesium | ~37% Daily Value |
| Zinc | ~19% Daily Value |
Source: USDA FoodData Central / Jessica Gavin Culinary
What Type of Pumpkin Works Best?
This is something most people skip over and it actually matters a lot. Not all pumpkins are created equal when it comes to seeds.
Sugar pumpkins (also called pie pumpkins) are my top pick. They tend to yield smaller, crispier seeds with a thinner shell which means more crunch in every bite. Large carving pumpkins will still work, but the seeds tend to be bigger and the outer shell can be tougher.
💡 Pro tip: You can also roast seeds from other winter squash like butternut, spaghetti squash, or delicata. The method stays exactly the same just watch the oven more closely for smaller seeds, as they may be done faster.
Step-by-Step: How to Roast Pumpkin Seeds
Step 1: Remove and Clean the Seeds
Scoop the seeds out of the pumpkin and don’t worry about being perfect at first. Drop the seeds along with any attached pulp into a large bowl of cold water. The seeds will float to the top use your hands to rub away the stringy bits. Transfer to a colander and rinse under cold running water to remove any remaining pulp.
Stubborn seeds? Soak them in warm water for a few minutes, then rub them between your palms to loosen the fibers. They’ll float right up.
Step 2: Dry the Seeds Thoroughly (This Is the Most Important Step)
I cannot stress this enough: dry your seeds as much as possible. Any excess moisture creates steam in the oven, which leads to soggy, chewy seeds instead of crispy ones. Pat them dry between two clean kitchen towels and press firmly.
If you have time, spread the seeds on a baking sheet and let them air dry overnight. If you’re in a hurry, you can place them in a 200°F (93°C) oven for about an hour to dry them out more quickly. Either way, getting them genuinely dry is what separates a great batch from a disappointing one.
Step 3: Season Generously
Once dry, toss your seeds in a bowl with oil and seasoning. A good ratio to remember: 1 tablespoon of oil per 1 cup of seeds. Avocado oil and olive oil are both excellent choices. Make sure every seed gets coated using a bag to toss everything together works really well here.
At minimum, use a good pinch of sea salt. But don’t stop there see the seasoning ideas table below!
Step 4: Spread on a Baking Sheet in a Single Layer
This is another step where I see people go wrong. Pile your seeds on top of each other and they’ll steam rather than roast. Spread them out in a single, even layer on a parchment-lined baking sheet. Give each seed space. Seriously the more room, the crispier the result.
Step 5: Bake Low and Slow
Preheat your oven to 325°F (163°C). Bake for 20 30 minutes, stirring halfway through, until the seeds are light golden brown and smell nutty. Keep an eye on them seeds burn quickly, and the inside of the seed cooks faster than the outer shell looks done.
⚠️ Watch out! The inner seed inside the shell cooks much faster than the outside looks. Don’t rely on color alone taste test one at the 20-minute mark.
Step 6: Cool Completely Before Storing
Once out of the oven, let the seeds cool completely on the baking sheet. As they cool, they’ll crisp up even more. If you transfer them while warm to a container, the steam will make them soggy. Patience here pays off!
Quick Reference: Roasting at a Glance
| Step | What to Do | Why It Matters |
|---|---|---|
| 1. Clean | Float in cold water, rinse in colander | Removes pulp & fibres |
| 2. Dry | Towel dry + air dry or low oven | Moisture = soggy seeds |
| 3. Season | 1 tbsp oil + salt per 1 cup seeds | Coats evenly for flavour |
| 4. Spread | Single layer on parchment sheet | Even roasting & crispiness |
| 5. Bake | 325°F for 20 30 mins, stir halfway | Golden brown & crunchy |
| 6. Cool | Full cool before container | Prevents sogginess from steam |
Seasoning Ideas: Go Beyond Plain Salt
Once you’ve mastered the basic technique, this is where the real fun begins. The seeds act as a blank canvas you can take them in any flavour direction you want. Here are my favourite combinations:
| Flavour Profile | Ingredients to Add | Best Paired With |
|---|---|---|
| Classic | Sea salt, olive oil | Snacking, salads, soups |
| Garlic & Herb | Garlic powder, rosemary, salt | Pasta dishes, roasted veggies |
| Smoky & Spicy | Paprika, cayenne, cumin, salt | Chili, taco bowls, guacamole |
| Sweet & Warm | Cinnamon, nutmeg, maple syrup, pinch of salt | Oatmeal, yoghurt, desserts |
| Curry | Curry powder, turmeric, olive oil | Curried soups, rice dishes |
| Mediterranean | Za’atar, sumac, Aleppo pepper | Hummus, flatbreads, salads |
Tip: If you’re using sugary seasonings like maple syrup or brown sugar, add them in the last 5 minutes of roasting to prevent burning.
The Boiling Method: Is It Worth It?
You may have read about simmering pumpkin seeds in salted water before roasting. The idea is that it helps season them from the inside out and produces a crispier shell. Some cooks swear by it boiling for about 5 10 minutes in salted water before patting dry and roasting.
Personally? I’ve tried it both ways. The boiling method does produce a noticeably crunchier outer shell, and it helps the salt penetrate deeper into the seed. If you have an extra 15 minutes, it’s worth trying. But if you’re short on time, simply drying your seeds very well before roasting gets you a fantastic result too.
How to Store Roasted Pumpkin Seeds
Store your fully cooled seeds in an airtight container at room temperature. They’ll stay fresh and crunchy for up to a week. For longer storage, pop them in the fridge pumpkin seeds have a relatively high fat content and are prone to going rancid if left in a warm place for too long.
Medical News Today recommends keeping pumpkin seeds “in a cool, dark, and dry place to improve shelf life” or in the fridge or freezer for extended storage.
Creative Ways to Use Roasted Pumpkin Seeds
- 🥗 Salads Toss on top instead of croutons for a nutrient boost
- 🥣 Oatmeal or yoghurt bowls Add crunch to your morning breakfast
- 🍲 Soups Sprinkle over butternut squash or pumpkin soup as a garnish
- 🍞 Baked goods Press into bread dough or muffin tops before baking
- 🌮 Grain bowls & tacos Use as a crunchy topping
- 🍫 Trail mix Mix with dark chocolate chips, dried cranberries, and nuts
Common Mistakes to Avoid
- Not drying the seeds enough This is the #1 reason roasted pumpkin seeds turn out chewy instead of crispy.
- Roasting at too high a temperature High heat burns the outside while the inside stays raw. Low and slow wins.
- Overcrowding the pan Always use a single layer; seeds need air circulation to crisp properly.
- Storing before fully cooling Warm seeds release steam in a closed container, leading to sogginess.
- Walking away from the oven Seeds go from golden to burnt very quickly. Stay nearby, especially in the final 5 minutes.
Final Thoughts
Roasted pumpkin seeds are one of those small kitchen wins that feel incredibly rewarding. You’re taking something most people discard and turning it into a crunchy, nutritious snack that tastes like you put in way more effort than you actually did.
Whether you keep it simple with salt and olive oil, or go bold with curry powder and maple syrup, the method is the same. Clean well, dry thoroughly, season generously, and roast low and slow. Do those four things, and you’ll have a perfect batch every single time.
Now go rescue those seeds from the compost bin you’ve earned that snack.
References
- Nutritional Value, Phytochemical Potential, and Therapeutic Benefits of Pumpkin (Cucurbita sp.) National Institutes of Health / PMC, Published June 2022
- Pumpkin Seeds, Unsalted USDA FoodData Central, U.S. Department of Agriculture (Last accessed 2025)
- The Health Benefits of Pumpkin Seeds Cleveland Clinic Health Essentials, November 2024
- Why Add Heart-Healthy Pumpkin Seeds to Your Diet Dartmouth Health, October 2025
- Pumpkin Seeds: Benefits, Nutrition, Uses Medical News Today, May 2025
- Nutritional and Health Potential of Edible Seeds: Micronutrient Bioavailability and Mechanistic Insights NIH / PMC, 2025